Ogham Storyteller works by breaking your story into “Nodes” these can be thought of as the sequences of your story.
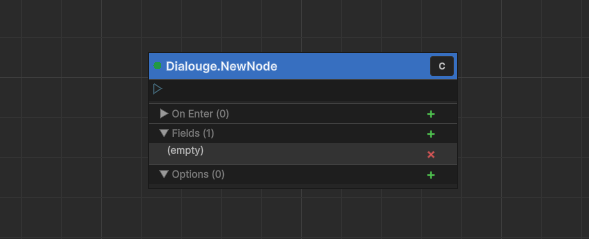
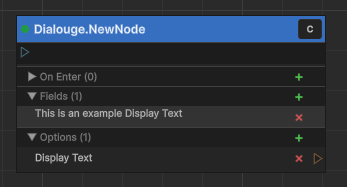
Anatomy of a Node #
Operations #
A node may define a set of operations that execute when it is entered. These are GameplayTag Operations that execute against the Storyteller state.
Options #
A node may define a set of options that travel out from the node. Options are described in more detail in their own article.
Type #
A node can be toggled between:
Content Node
This is the default when you create a new node.
A content node as its name might suggest defines a sequence of content. That is it can define the text, audio, images, prefabs, etc. that should be presented to the player when this node is active.
Content is defined on a node by adding fields. Fields are ordered, that is the 1st field you add will always be the first field on this node and that order is generally important for other parts of your game.
For example, your game logic may assume that the 1st field is the speaking character’s name, the 2nd its avatar and the 3rd the text it is speaking. You could also have the 4th be the Voice Over clip for that sequence of content.
As suggested above, a field can any kind of content you might display. Text is the default but you can also define textures/sprites, audio and even prefabs as fields of a node.
Fork Node
A fork has no content and must have at least 1 option. The options of a fork node are automatically evaluated and the first option whose conditions pass will be invoked. Options on a fork node do not track a GameplayTag, they are treated as an extension of the option that navigated to them.
As noted a fork must have at least 1 option, the default. The Default option cannot have any conditions and is the route the system will travel if no other option is valid.
Writing #
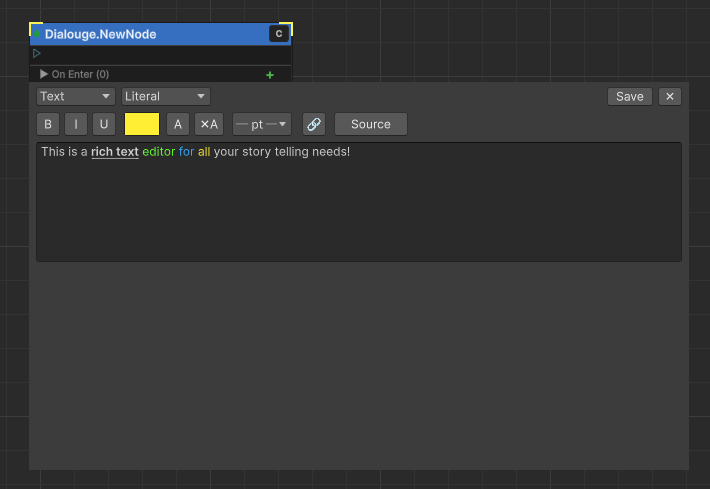
You write your content by adding “fields”; you add a field by simply clicking the add button located to the right of the Fields area.
Click the new field and a rich text editor will appear. Remember a field can be Text, Sound, Image or Prefab.
Pro Tip:
The order you add fields in matters for your game logic. You can have as many fields as you like and what they mean is up to your game.
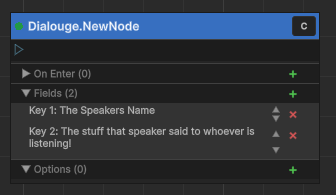
For example:
In a game where you display the name of the speaker and what they are saying you will probably choose to add at least 2 fields.
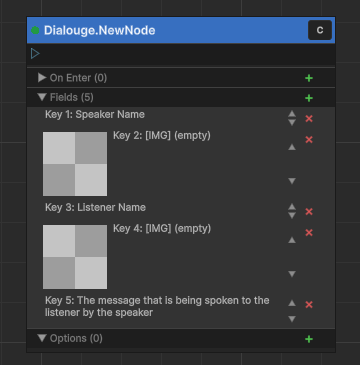
Alternatively you have a speaker and a listener and indicate the portrait for each by adding fields in the following pattern.
Tag Formatting #
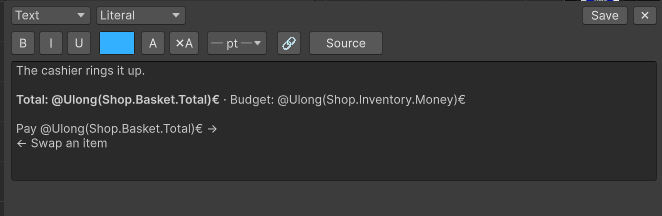
Its a common requirement to display the value of some variable. In Ogham all “variables” are identified by tag and so you can use the Tag Formatting syntax to display the value of any state tag.
// Display the value as an unsigned 64bit number
@Ulong(Tag.Name, formatString)

// Display the value as a signed 64bit number
@Long(Tag.Name, formatString)

// Display the value as a singed 32bit number
@Int(Tag.Name, formatString)

// Display the value as an unsigned 32bit number
@Uint(Tag.Name, formatString)

// Display the value as a floating 32bit number
@Float(Tag.Name, formatString)

// Display the value as a foating 64bit number
@Double(Tag.Name, formatString)

// Display the value as a Lexicon ID
@String(Tag.Name)
The numeric values all work with C#’s ToString(formatString) so you can further adjust the display of the number. The formatString is optional, if omitted its the same as calling ToString() without any paramiters and will simply display an unformatted number.
In the case of String we read the value as if its a Lexicon Localization id to a text value, so this will return the localised string stored at that ID.
In-Line Linking #
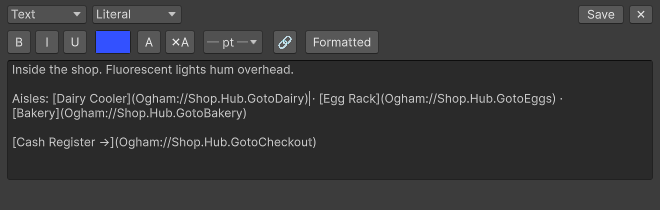
Click the Source/Formatted button to reveal the underlying formatting, not strictly required but this makes it easier to see what is going on with links.
The editor uses a Markdown style link system and can technically handle a wide range of protocols. For most use cases you will use Ogham:// indicating that this link invokes an option.
This is an example [Display Text](Ogham://The.Option.Tag)The editor will create an option for this link by matching the tag you provide.
Click on that newly created option and you can edit its properties.
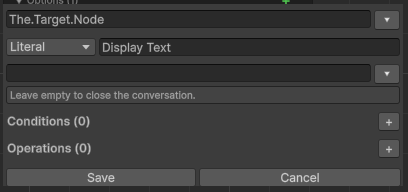
Node – On Enter #
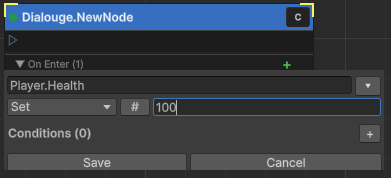
When the story enters a node it can execute operations and these operations can them selves have conditions. This works much like the Option Operations.
Forks and Routes #
Complex stories often need to reroute the flow based on state conditions. While Option Conditions can handle simple cases such as preventing the player from choosing an invalid option you may also want to “fork” the path based on a value in the state not simply prevent them from choosing the option at all.
Use Case Example:
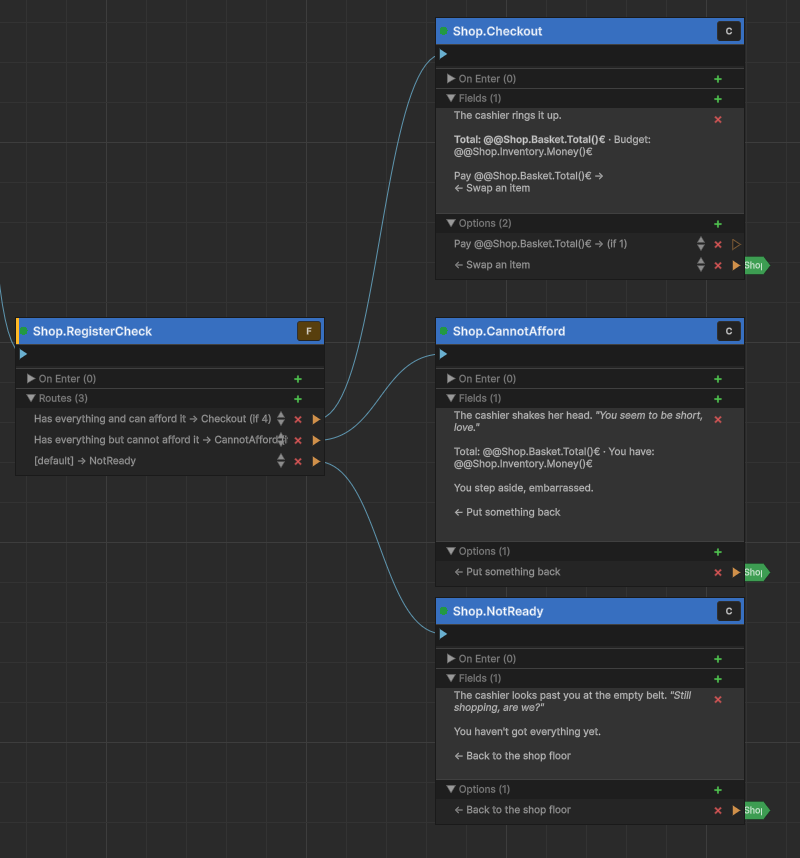
in our demo when the player selects “Cash Register” we use a Fork to select what node the player will enter.
- If they have collected all of the required items and have enough money they will move to “Shop.Checkout”
- if they have collected all of the required items and do not have enough money they will move to “Shop.CannotAfford”
- The default, e.g. if none of the prior conditions are true, they will move to “Shop.NotReady”
To create a Fork create a new node, then click the [ C ] button in the upper right corner of it.
C stands for Content
Content nodes display text, images, etc. and typically require player input to progress.
The value will change to [ F ]
F stands for Fork
Fork nodes do not display any content and have “Routes” instead of options. A route is chosen based on condition logic and happens automatically when the node is entered.
You can now add “Routes” are basically “Options” but the player doesn’t choose them instead when the Fork is entered it will evaluate each route and traverse the first one that matches. If none match it will traverse default which is an empty option with no conditions.